Hello Everyone,
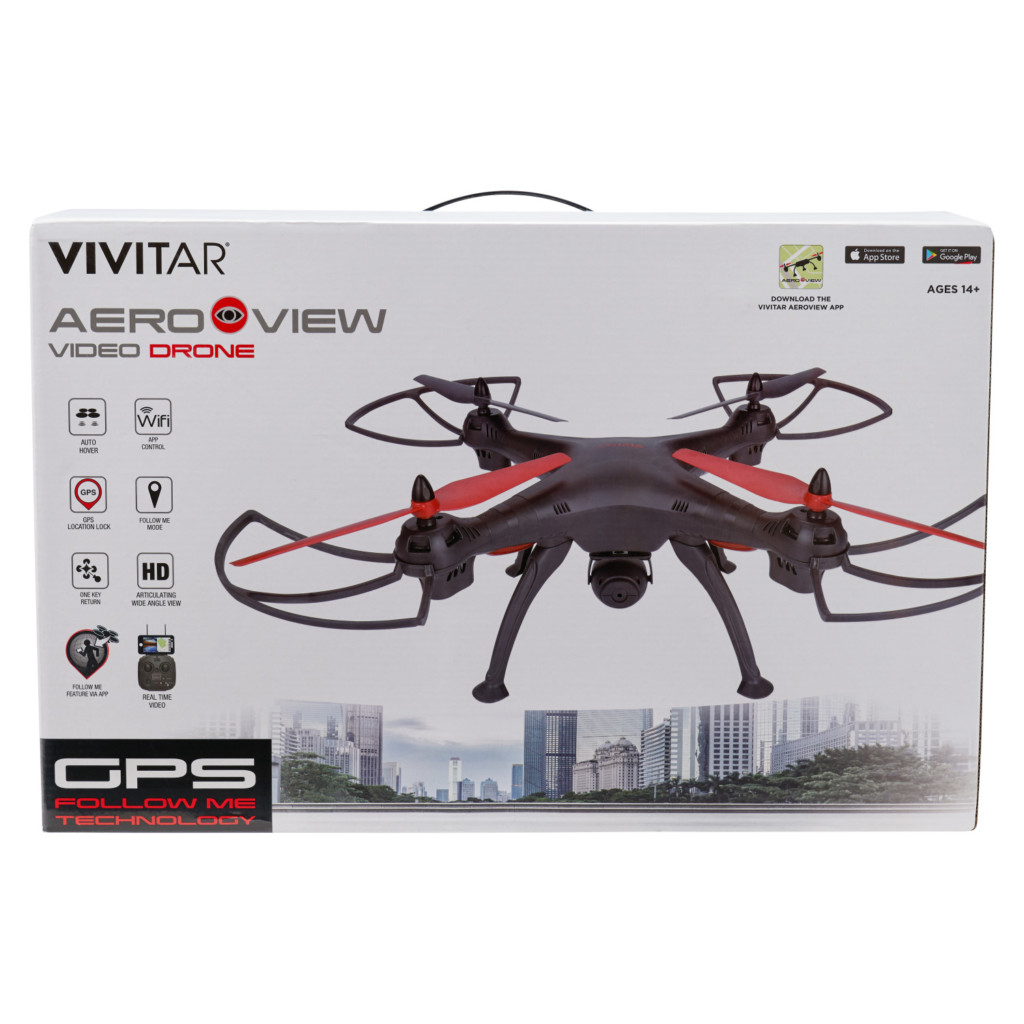
Today we will talk about Vivitar Aeroview Drone. This HD Video capable quadcopter is loaded with plenty of features like waypoints mode, orbit mode, return to home, headless mode, auto take-off mode and follow me mode.
You will be getting a largely white color rectangular box during delivery. According to the company, it is recommended for the 14+ age, but 10 or 12 years old kids can also give it a try.
It can fly up to 1000feet and up to 10 mins of flight time. The app you will download to control the drone is supported in iOS and Android versions.
The drone comes well packaged; all the different items are covered with Polystyrene thermal to avoid possible damage during the delivery process.
Once you open the box, you will see the user manual and QR Code to scan and download the app.
The quadcopter is available only in one color, so that you would be getting a black color body with propellers in two different colors. There would be no camera and landing gear attached that you have to assemble by yourself.
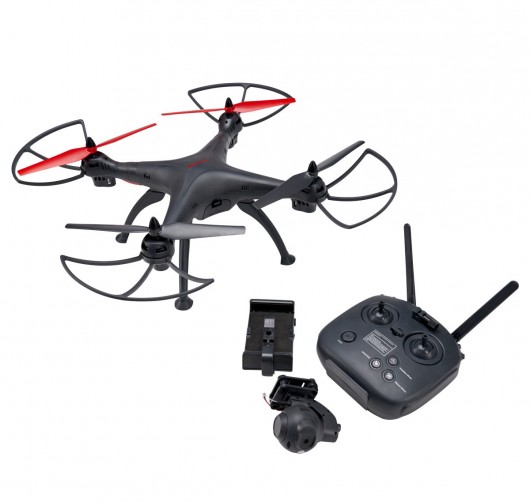
You would be having two spare propellers, a USB charger, and other cables as well. You would also be getting a mobile device mount attached to the transmitter.
The mobile holder is big enough, and probably all big size phones will fit there easily. The battery with the drone is 7.4V & 2000mAh, and they also give you the 4 AA batteries for the transmitter. That’s pretty good otherwise in other drones, and you have to buy it separately.
There would be larger propeller guards that you can attach later on for the safety of the drone. Then, you have an HD Camera module that you can attach with the quad.
I love that here, and you would be getting different options of the camera module to choose from. Either you can go for the camera gimbal with the app tilt feature or the manual tilt feature.
Then, at last, you have the remote controller below the box, which has solid build quality, black color, and at the backside of the controller, you have this rugged surface to give you a better grip and hold of it.
Below is the complete list of items you would be getting with the package.
- Vivitar Aeroview Drone (1)
- Remote Controller (1)
- Spare Propellers (2)
- Camera Module (1)
- Propeller Guards (4)
- USB Charging Cable (1)
- Mobile Device Mount (1)
- AA Transmitter battery (4)
- 7.4V 2000mAh Drone battery (1)
- Landing Legs
- User Manual
Vivitar Aeroview Drone Review
This section will talk about the different important aspects of the quadcopter that you should be aware of. We’ll cover build quality, camera specs, advanced features, and multiple modes.
You need to have the FAA Registration for this drone as it weighs around 650grams.
Build Quality
It looks like the DJI Phantom drone in black color, but it is a SEMA x8 Variant or clone. It is built of good quality plastic, making it strong and more durable. On top of the drone, Vivitar is written in Red.
Here, you would be getting the brushed motors. You can easily snap in all the propeller guards and make sure they are fit properly; you have to apply a little bit of pressure for their perfect fit.
You have a camera module at the bottom of the quadcopter that fits perfectly.
It has dampeners to eliminate the shake during the flight. There is no memory card slot in the camera. Everything would be saved to your smartphone directly.
The drone also has the GLONASS chip, which allows it to quickly capture the satellite connection.

I love the camera mount because you can use the action camera mount over here, which allows you to use the GoPro, Firefly, or Vivitar action camera, which gives you better video quality.
You can buy this Vivitar aero view drone accessory separately. If you don’t want to use the action camera, you can also go with the other options, which fit flat at the bottom. But, for that, you have to strap it properly.
For installing landing legs, you have to apply the two screws each.
When it comes to LED lights, it has very bright different color LEDs, which help you keep track of the front and back parts of the drone.
Battery Specs
Here, you would be getting blue color 7.4V 2000mAh battery which fits perfectly in the battery bay. Keep the battery away from the hot and wet atmosphere. It gets charged in one and a half hour and provides you the 10 mins of battery backup.
There are a couple of things that you have to keep in mind regarding battery safety. Don’t overcharge it and in case you are using a different charger, make sure it has the same voltage and ampere reading.
The battery you would be getting over here is used by other drones. You also have a light indicator on the USB Charger that lets you know that battery is charging. You can buy Vivitar spare batteries over here.
Remote Controller
The transmitter is large and well labeled. At the back, you can insert the four AA batteries. On the backside, you also have space to fix your fingers which provides you a better grip.
There, also you find the buttons for auto take-off and landing. On the bottom left, you have the ON & Off button. Then you have left and right throttle, rotor button, headless mode button, home lock button, and speed rate button (30% to 100%).
You can also do the emergency stop to the quadcopter in case required. It also has folding antennas, which provide you with a better connection.
Then, you have a mobile device mount that you have, and then you can use it. The mobile holder has the space for a large mobile device but not for a tablet. It has 2.4Ghz controlling, and you get around 1000feet control.
Aeroview APP Control
The drone has around 80-100m of FPV range. The drone app has very easy navigation. We have a home button in the upper left corner; then we have all the information about GPS, height, several satellites, and much more.
You can also change the joystick settings and set it at your disposal (Not recommended for beginners). App also has map setting, invert camera option, and others.
On the left side, you can use the advanced GPS feature like Waypoint, in which you can set multiple points, and the drone will follow the path precisely.
You can also enable virtual control if you want to operate through mobile. You see the gallery option at the bottom of the screen, where images and videos will be saved.
Multiple Advanced Modes
You get multiple advanced modes with the drone that takes the flying experience to a completely new level. So, let’s dive into all of these modes one by one.
- Follow Me Mode: The drone can also do the follow Me Mode. It helps you to keep the moving object in the frame, and you get very cool footage out of it. Keep in mind the subject should not move very fast. The subject should have continuous stable motion if you want stable footage. When you are using this mode, there is no hurdle on the way. Otherwise, you will end up crashing it. It will take some time to master this mode, so spend some and don’t start using it from the very first flight until or unless you are a very good pilot.
- Return to Home: The drone also has a return to a home, which allows you to bring the quadcopter back home with a single button click. GPS drives this, so landing is very precise and accurate. This feature lets you bring back the drone when it goes out of sight or loses connection. In that case, you don’t know what to do. So, this will help you a lot.
- Headless Mode: If you are flying a drone for the first time, then this mode will help you a lot. Because, in this case, you don’t have to worry about the orientation. You can operate the drone with the same controlling no matter what direction the drone is facing.
- Orbit Mode: This is a very cool model that the drone can do. This mode allows you to rotate the quadcopter around the subject and get a perfect drone shot. Before using this mode, you have to enter several parameters like radius, height, and speed, and the drone will start hovering around the subject, giving you the perfect unique video.
- Waypoints Mode: This is a highly advanced mode in which you set the route’s path, and then the drone follows the whole path precisely. This mode allows you to add a different perspective to your footage and is used by many professional filmmakers.
Flight Performance
The drone has very good flight performance. It takes off quickly, and strong motors give you a better lift. In the GPS Lock Mode, it will hover at the same position.
It is very responsive to the controller. At full speed, it flies very fast, so if you are a beginner, I would recommend you to fly it at 30%.
Orbit Mode is also very precise. With a click of a single button, it will start hovering around the subject. Though drone footage is not that impressive, it will fulfill your needs if you are a beginner.
How far Vivitar Aeroview Drone can fly
How to fly & App Setup Instructions Tutorial
Setting the drone is very straightforward. Once the drone has fully charged battery inserted and in the transmitter, follow the below instructions.
- Turn On the quadcopter by switching on the button at its bottom.
- Once you turn it ON, you will see the lights in the quad will start blinking.
- Then turn ON the transmitter as well.
- You need to move the left throttle stick up and down for the binding. Once that is done, you will see the solid LED lights.
- Once the connection is done, you need to do the calibration. For Gyro Calibration, you need to move both the sticks to the left, and you will see the light blinking.
- Once the Gyro is calibrated, you need to calibrate the GPS Compass that you can do by simply pushing the button at the right side corner.
- While doing the compass calibration, rotate the drone on its axis a couple of times, keeping it at the same position until the red lights are solid. Then face the quadcopter downwards till blue lights go solid, and then put the drone on the ground, and it will go green.
- It has a perfect GPS System because of the GLONASS chip, which allows you to quickly achieve home lock.
- Now, open the WIFI and connect with the Vivitar Aeroview App. Then launch the app.
- You will see the help icon in the left corner that will help you with the app instruction. Click on the start button, and then you have the live feed.
- You can also contact Vivitar support for more information.
Drone Calibration
Technical Specifications
Watch the Video till the End
BETTER & AFFORDABLE ALTERNATIVES (RECOMMENDED)
Conclusion
When it comes to the drone’s flight performance, it’s fantastic. It has a solid build quality and a good aesthetic look. Though Vivitar aero view drone camera specs are not good, the drone flight experience is fantastic.
I would recommend buying some extra batteries to have consecutive flights as they are available at a cheaper rate. If you face any problem, you can call Vivitar aero view drone customer service number.
I would say this is one of the best beginner’s drones as well as it is available at quite an affordable price. If you are looking for alternatives, below are some of Amazon’s bestseller drones.
There is also some cool drone tech in the market. There is a Drone Grenade launcher, and there are some Drones that swim underwater and help you fish.

 Manual, App, Specs & Instructions