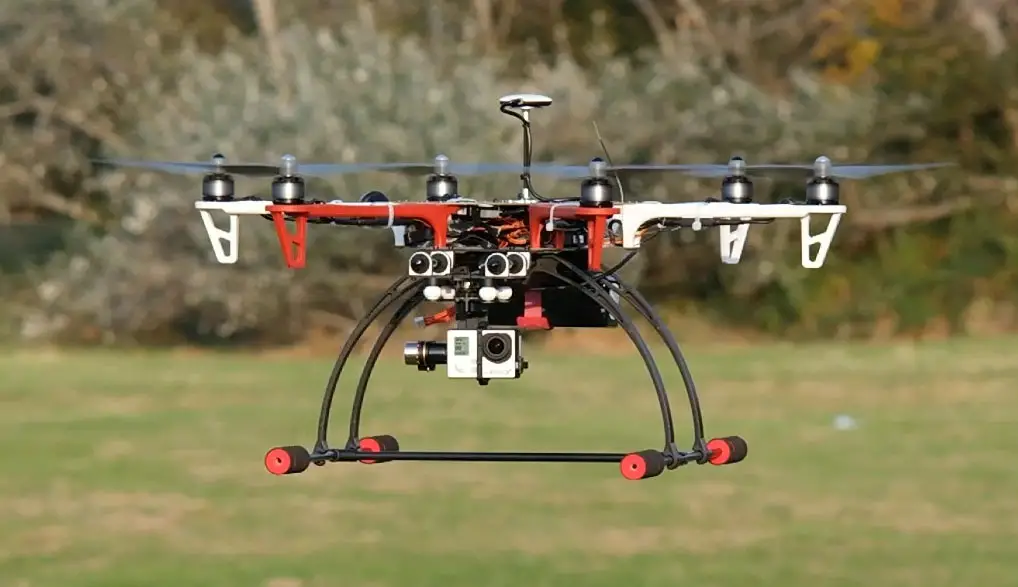
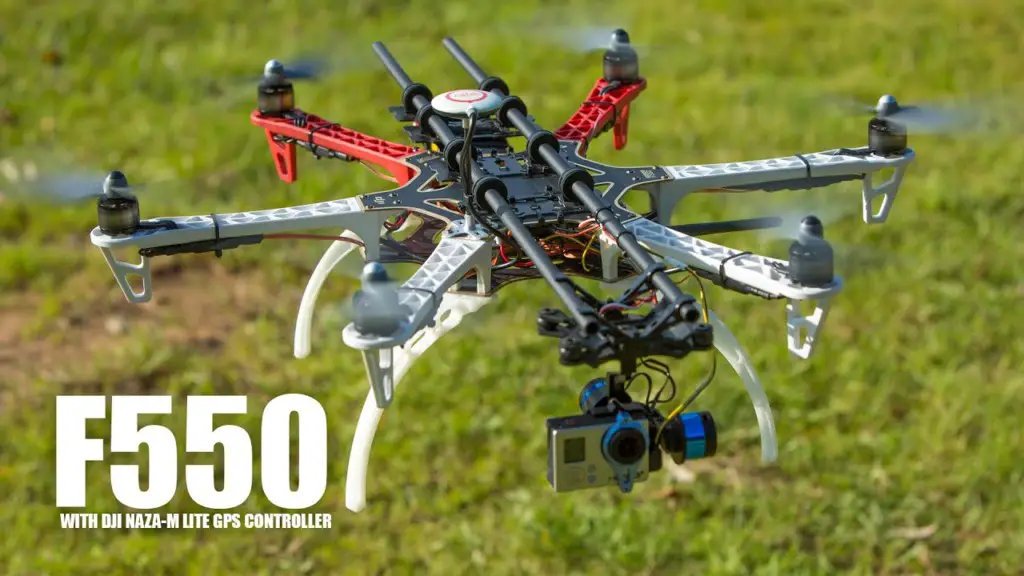
Finding parts becomes a complicated problem when it comes to building your drone. But DJI has made it very simple with the launch of DJI F550.
Now, you don’t have to search for the components from place to place. DJI F550 is a fully disassembled drone with all the necessary components.
If you are a hobbyist and want to make your drone, this could be a perfect fit for you.
DJI calls this drone design, Flame Wheel and there are three main versions you would be getting in this series. They are F330, F450, and the F550.
The F550 is the most popular one, probably because this one is hexacopter and the other two are quadcopter. All the models have the same features, but you would see some changes in design, and 550 provides better stability than others.
I love this drone because there are immense possibilities for its videography and photography. You can take it to a new level.
It gives you the perfect DIY experience, and you can do the customizations at your disposal. You can also extend the functions of your drone by adding some extra modules.
However, this drone doesn’t entice anyone. You might ask, “Why would I buy a disassembled drone?” But for some drone enthusiasts as they love doing DIY.
Some other companies sell the fully assembled customized drone at your disposal. Whatever extra features you want, they would do it for you.
Flame Wheel has solid frame arms with a PA66+30GF ultra-strength material design, making it more durable and resistant to possible crashes.
The frame design is constructed to get ample space to install the autonomous system. Flame wheels in three colors include Red, White, and Black.
So, if you want to make your drone and showcase it in front of your friends, this drone is for you. Take your creativity and innovation to the next level. Customize it at your disposal. Below are some of the items you will be getting with the F550 Kit.
Check the Best Price on Amazon
Table of Contents
Features of DJI F550
Frame Arms: They are made of extra durable materials. They are built of PA66+30GF, which is known for its high durability.
Though they are not that good for aesthetics, flame arms do the job very well. You also get strong PCB material that also reduces the chance of damage.
PCB Wiring: You also get integrated PCB wiring that allows you to easily wire the battery and other parts of the drone.
Room for Customisation: It comes with a large assembly space that gives enough space for your creativity. You can fit an autonomous system and other stuff to bring your imagination into reality.
The drone is Colourful: Frame comes in different colors, and you can choose you like. The options are white, red, and black.
Modules: It is a perfect hobbyist solution. You can build the drone of your dream. For GPS, you can use the Naza-M control system. You can go for the H3-2D gimbal and DT7 for remote control for stabilization.
Technical Specifications
- Flame Wheel Model: F550
- Frame Weight: 478g
- Wheelbase: 550mm Diagonal
- Takeoff Weight: 1200g ~ 2400g
- Propeller Recommendation: 10 × 4.5in; 8 × 4.5in
- Battery Recommendation: 3S~4S LiPo
- Motor Recommendation: 22 × 12mm (Stator size)
Which One Is Better? F550 vs. F450?
When it comes to stability, both drones have good stabilization. However, the size and payload capacity in both will vary. F450 RTF is smaller in size and can fly up to 15 minutes.
The gimbal and FPV are both the same as F550. If you are looking for more options, you can go for F550 as it gives you a smoother and better flight.
Using the Naza V2 controller allows you to control the hexacopter with five motors in case one dies, as it has six motors that will lead to less flight time than F450.
But, It’s an excellent DIY choice as it provides you with more space to experiment with.
Which One Is Better, NAZA Lite vs. NAZA V2?
You get two options to choose from for controlling the system; NAZA Lite & NAZA V2. Both have an inbuilt GPS receiver and fit perfectly with F550.
However, NAZA V2 gives you better stability, and most of the high-end users prefer it over the Lite version.
NAZA V2 allows you to work with different DJI Products. It can work with DJI zen muse gimbal, iOSD Module, and iPad Ground station, while Naza Lite doesn’t support any one of them. Naza V2 is an advanced version of NAZA Lite.
NAZA V2 costs a little more, but it also gives you more options to experiment with. So, if you want to build a drone with advanced features, it could be the right choice for you.
How to Assemble the F550 Drone

Once you purchase the kit, you will be getting several items with this. It would include six motors, a drone frame, 16 propellers.
You would also be getting a package of 6ESCs with all required screws. Battery strap and power cables would also be there.
While using the batteries, keep in mind which propellors you will use because the propellers for three-cell and four-cell batteries are entirely different.
With 10 inch propellers, you can use a 3s Lipo battery, and 4s lipo batteries are for 8-inch propellers.
Tools Required: You will also need some extra tools when it comes to assembly. Keep everything handy. You will need solder, flux, and soldering iron.
Don’t get overwhelmed by it if you are new to drone DIY. I would highly recommend reading the instructions correctly before you start fiddling with them. Use the PCB Connections properly.
Crosscheck the Connections: This is the significant thing. You have to cross-check all the connections before doing the installation. Also, do the soldering properly to not come off very quickly.
Remember, while flying, the drone will see a lot of flips and turns. So, if you don’t want any motor to stop during a flight, make sure you do the soldering job right.
If you are not good at it, you can help someone who knows it because it should not come off in aggressive and high-speed flying.
Read the Manual: You can download the manual from DJI Official website.
In the manual, they have clearly explained what needs to be done. How to attach ESCs, autopilot, and other components to the frame.
The drone’s legs should be attached on the bottom side where all the electronic components have been soldered.
Installation Process: Firstly, you have to attach the motor to the ESC then controller installation needs to be done at the bottom of the board.
Also, make sure that everything is facing in the right direction. The controller inputs should face the rear part of the drone.
Once the controller mounting is done, you can download and install the latest software from the DJI website. If everything is working right, all the connections are made right.
Then, you have to mount the battery and GPS on the board. Cross-check the direction of propellers; they should move in the right direction.
There is a proper way of installing the propellers. They are in pairs and labeled at the bottom to know which prop will be at which end.
If there is a mismatch in propellers, the drone will not take off, and in the worse case, it might tumble down before take-off.
GPS is Important: This is also a critical process. Installing it is straightforward. Mount it properly. If you have any confusion, go through the manual again.
Take GPS as the backbone of a drone, a simple mistake, and your drone will be in trouble. Once the proper mounting is done, calibrate the compass and test your flight.
Conclusion
So, this was the basic installation of the drone. If you want to add more creativity to make a next-level drone, then you can add a gimbal as well. You can also add a GoPro camera mount for amazing videography and photography.
If you are a newbie, I would recommend going with the basic setup first, understanding the drone, and gradually customizing and making a better version.
I hope you enjoyed this article. If you need any help, you can ask your questions in the comments below. Till then…
HAPPY DRONE DIY!!!


